


tripods
video tripods
heads
backgrounds
stands, arms & clamps
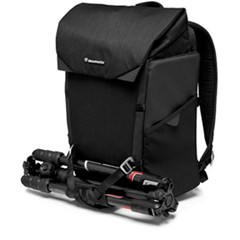
camera bags
lighting control
Best Sellers
-
 LL LR83351
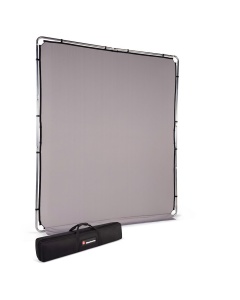
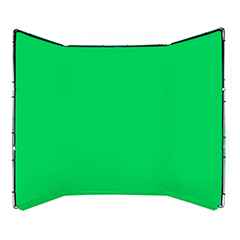
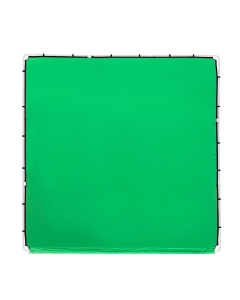
StudioLink Chroma Key Green Cover 3 x 3m
$413.95Weight 5.51 lbs Color chromakey green Material Polyester Height 118.11 in Width 118.11 in Weight 5.51 lbs -
- Web Exclusive
- Save -39%
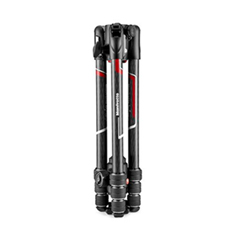
 MKBFRTA4CAM3-BH
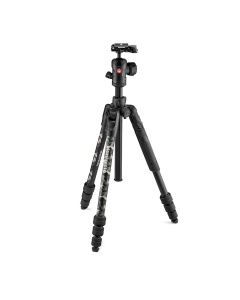
Befree Advanced Camo Wild Green Travel Tripod Twist
$129.00Old price:$209.99Weight 3.28 lbs Maximum Height 59.06 in Closed Length 15.75 in Head Type Ball Head Safety Payload UNI/PdR 105:2021 19.84 lbs Maximum Height (with Center Column Down) 50 in Base Diameter 1.57 in Carrying Bag Included Yes Center Column rapid Upper Disc Diameter 1.57 in Color Green Leg Sections 4 Top Attachment 1/4″ screw Base Type 1.57 in Easy Link Yes Friction Control Yes Min Height 15.75 in Independent Pan Lock Yes Ball Locking Yes Leg Type Single Leg Angles 22°, 54°, 89° Leg Lock Type Twist Lock Legs Tube Diameter 0.47- 0.61- 0.75- 0.89 in Material Aluminum Maximum Working Temperature 158 °F Minimum Working Temperature -22 °F Pan Drag NONE Panoramic Rotation 360 ° Plate Type 200PL PRO Quick Release Yes Tilt Drag NONE -
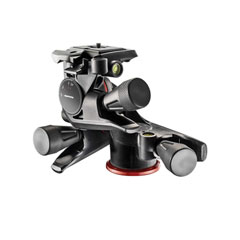
 MK055CXPRO4BHQR
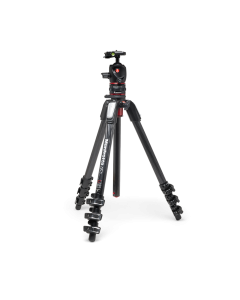
055 Carbon 4-Section Tripod with XPRO Ball Head + MOVE
$749.00Weight 6.48 lbs Maximum Height 72.83 in Closed Length 26.38 in Head Type Ball Head Safety Payload UNI/PdR 105:2021 33.07 lbs Maximum Height (with Center Column Down) 61.02 in Base Diameter 2.36 in Bubble Spirit Level (No.) 3 Carrying Bag Included none Center Column rapid Upper Disc Diameter 2.36 in Certifications none Color Black Leg Sections 4 Top Attachment 1/4″ screw Easy Link Yes Friction Control Yes Front Tilt -90° / +40° Min Height 25.39 in Independent Pan Lock yes Ball Locking Yes Independent Tilt Lock yes Lateral Tilt -90° / +40° Leg Type Single Leg Angles 25°,46°,66°,88° Leg Lock Type Flip Lock Legs Tube Diameter 1.15- 0.98- 0.8- 0.63 in Material Aluminum, Carbon Fiber Maximum Working Temperature 140 °F Minimum Working Temperature -22 °F Pan Drag NONE Panoramic Rotation 360 ° Plate Type 200PL-14 Quick Release Yes Tilt Drag NONE -
- Save -25%
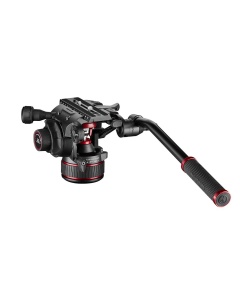
 MVH504XAH
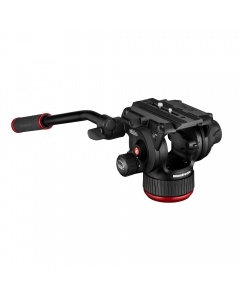
504X Fluid Video Head with flat base
$364.95Old price:$487.95Weight 4.41 lbs Safety Payload UNI/PdR 105:2021 26.46 lbs Counterbalance System Variable Steps Counterbalance Weight 4.85- 9.7- 14.33 lbs Base Diameter 2.95 in Material Aluminum Bubble Spirit Level (No.) 1 Center of gravity 2.17 in Powered by (batteries) Lithium Certifications WEEE; RoHS Top Attachment 1/4″ screw, 3/8″ screw Color Black Easy Link Yes Front Tilt -70° / +90° Ball Flat Flat Head Type Video/Fluid Head Maximum Working Temperature 140 °F Minimum Working Temperature -22 °F Pan Bar Included Yes Pan Drag continuously adjustable from 0 to max level Panoramic Rotation 360 ° Plate Type 504PLONGR-1 Quick Release Yes Tilt Drag continuously adjustable from 0 to max level Working Height 5.87 in Accessory Compatibility MVAPANBARM; MVAPANBARL
Highlights
Photos
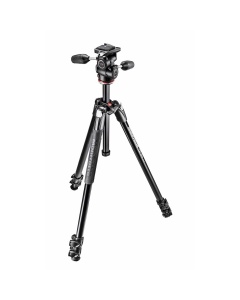
 MK190X3-2W
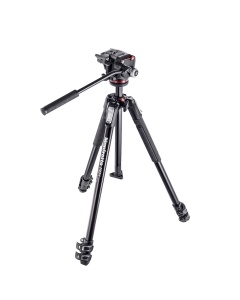
190X aluminium 3-Section Tripod with XPRO Fluid Head
$399.95
| Weight | 6.06 lbs |
| Maximum Height | 66.93 in |
| Closed Length | 27.17 in |
| Head Type | Video/Fluid Head |
| Safety Payload UNI/PdR 105:2021 | 11.02 lbs |
| Maximum Height (with Center Column Down) | 57.09 in |
| Base Diameter | 2.36 in |
| Bubble Spirit Level (No.) | 1 |
| Carrying Bag Included | none |
| Center Column | rapid |
| Upper Disc Diameter | 2.36 in |
| Color | Black |
| Leg Sections | 3 |
| Top Attachment | 1/4″ screw |
| Easy Link | Yes |
| Friction Control | No |
| Front Tilt | -60° / +90° |
| Min Height | 3.54 in |
| Independent Pan Lock | yes |
| Ball Locking | No |
| Independent Tilt Lock | yes |
| Leg Type | Single |
| Leg Angles | 25°,46°,66°,88° |
| Leg Lock Type | Flip Lock |
| Legs Tube Diameter | 1.02- 0.89- 0.75 in |
| Material | Aluminum, Technopolymer |
| Maximum Working Temperature | 140 °F |
| Minimum Working Temperature | -22 °F |
| Pan Drag | fluid cartridge with fixed drag |
| Panoramic Rotation | 360 ° |
| Plate Type | 200PL-14 |
| Quick Release | Yes |
| Tilt Drag | variable (2 steps) |
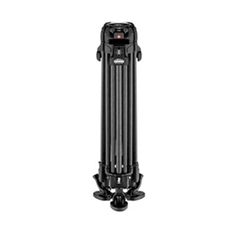
 MK190XPRO4-3W
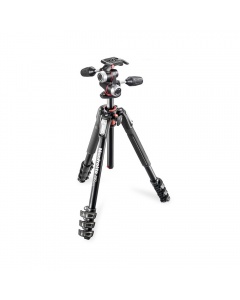
190 Aluminium 4-Section Tripod with head
$419.95
| Weight | 6.83 lbs |
| Maximum Height | 68.11 in |
| Closed Length | 24.41 in |
| Head Type | 3 Way Head |
| Safety Payload UNI/PdR 105:2021 | 26.46 lbs |
| Maximum Height (with Center Column Down) | 58.27 in |
| Base Diameter | 2.36 in |
| Bubble Spirit Level (No.) | 4 |
| Carrying Bag Included | none |
| Center Column | rapid |
| Upper Disc Diameter | 2.36 in |
| Color | Black |
| Leg Sections | 4 |
| Top Attachment | 1/4″ screw |
| Easy Link | Yes |
| Friction Control | Yes |
| Front Tilt | -30° / +90° |
| Min Height | 3.15 in |
| Independent Pan Lock | yes |
| Ball Locking | No |
| Independent Tilt Lock | yes |
| Lateral Tilt | -30° / +90° |
| Leg Type | Single |
| Leg Angles | 25°,46°,66°,88° |
| Leg Lock Type | Flip Lock |
| Legs Tube Diameter | 1.02- 0.89- 0.75- 0.61 in |
| Material | Aluminum |
| Maximum Working Temperature | 140 °F |
| Minimum Working Temperature | -22 °F |
| Pan Drag | NONE |
| Panoramic Rotation | 360 ° |
| Plate Type | 200PL-14 |
| Quick Release | Yes |
| Tilt Drag | NONE |
 MK290XTA3-3WUS
290 XTRA Kit, Alu 3 sec. tripod with 3W head
$249.99
| Weight | 5.56 lbs |
| Maximum Height | 67.52 in |
| Closed Length | 27.83 in |
| Head Type | 3 Way Head |
| Safety Payload UNI/PdR 105:2021 | 22.05 lbs |
| Maximum Height (with Center Column Down) | 58.07 in |
| Base Diameter | 2.36 in |
| Bubble Spirit Level (No.) | 1 |
| Carrying Bag Included | 109711 |
| Center Column | rapid |
| Upper Disc Diameter | 2.36 in |
| Color | Black |
| Leg Sections | 3 |
| Top Attachment | 1/4″ screw |
| Easy Link | No |
| Friction Control | No |
| Front Tilt | -30° / +90° |
| Min Height | 16.54 in |
| Independent Pan Lock | yes |
| Ball Locking | No |
| Independent Tilt Lock | yes |
| Lateral Tilt | -30° / +90° |
| Leg Type | Single |
| Leg Angles | 25°,46°,66°,88° |
| Leg Lock Type | Flip Lock |
| Legs Tube Diameter | 1.02- 0.89- 0.75 in |
| Material | Aluminum, Technopolymer |
| Maximum Working Temperature | 140 °F |
| Minimum Working Temperature | -22 °F |
| Pan Drag | NONE |
| Panoramic Rotation | 360 ° |
| Plate Type | \200LT-PL |
| Quick Release | Yes |
| Tilt Drag | NONE |
Video
- Save -24%
 MVH608AHUS
Nitrotech 608 Fluid Video Head With Continuous CBS
$459.95
Old price:
$606.95
| Weight | 4.89 lbs |
| Safety Payload UNI/PdR 105:2021 | 30.86 lbs |
| Counterbalance System | Variable Continuous |
| Counterbalance Weight | 0 → 17.64 lbs |
| Material | Aluminum |
| Bubble Spirit Level (No.) | 1 |
| Center of gravity | 2.17 in |
| Powered by (batteries) | Lithium |
| Certifications | WEEE; RoHS |
| Top Attachment | 1/4″ screw, 3/8″ screw |
| Color | Black |
| Easy Link | Yes |
| Front Tilt | -70° / +90° |
| Ball Flat | Flat |
| Head Type | Video/Fluid Head |
| Maximum Working Temperature | 122 °F |
| Minimum Working Temperature | -4 °F |
| Pan Bar Included | Yes |
| Pan Drag | continuously adjustable from 0 to max level |
| Panoramic Rotation | 360 ° |
| Plate Type | 504PLONGR |
| Quick Release | Yes |
| Tilt Drag | continuously adjustable from 0 to max level |
| Working Height | 5.91 in |
| Accessory Compatibility | MVAPANBARM; MVAPANBARL |
- Save -24%
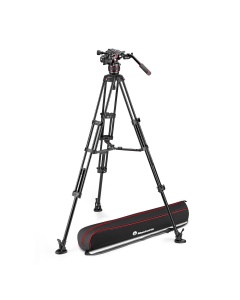
 MVK504XTWINGA
504X Fluid Video Head with Alu Twin leg tripod GS
$799.95
Old price:
$1,057.95
| Weight | 12.9 lbs |
| Safety Payload UNI/PdR 105:2021 | 26.46 lbs |
| Counterbalance System | Variable Steps |
| Counterbalance Weight | 4.85- 9.7- 14.33 lbs |
| Maximum Height | 68.9 in |
| Min Height | 19.29 in |
| Base Diameter | 2.95 in |
| Bubble Spirit Level (No.) | 1 |
| Center of gravity | 2.17 in |
| Carrying Bag Included | yes |
| Center Column | no center column |
| Closed Length | 33.46 in |
| Color | Black |
| Top Attachment | 1/4″ screw, 3/8″ screw |
| Ball Flat | Flat |
| Powered by (batteries) | Lithium |
| Easy Link | Yes (with antirotation) |
| Front Tilt | -70° / +90° |
| Head Type | Video/Fluid Head |
| Leg Type | Twin |
| Leg Lock Type | Flip Lock |
| Material | Aluminum |
| Maximum Working Temperature | 140 °F |
| Minimum Working Temperature | -22 °F |
| Pan Bar Included | Yes |
| Pan Drag | continuously adjustable from 0 to max level |
| Panoramic Rotation | 360 ° |
| Plate Type | 504PLONGR-1 |
| Quick Release | Yes |
| Spreader | low level - variable arm length |
| Tilt Drag | continuously adjustable from 0 to max level |
| Accessory Compatibility | 114MV; 181B; 565; 537SPRB; MVAPANBARM; MVAPANBARL |
- Save -24%
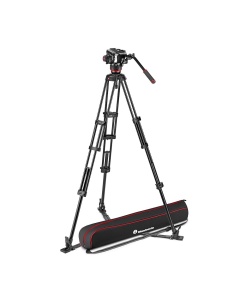
 MVK608TWINMAUS
Nitrotech 608 video head, alu twin leg tripod ms
$899.95
Old price:
$1,176.95
| Weight | 12.72 lbs |
| Safety Payload UNI/PdR 105:2021 | 30.86 lbs |
| Counterbalance System | Variable Continuous |
| Counterbalance Weight | 0 → 17.64 lbs |
| Maximum Height | 66.54 in |
| Min Height | 29.53 in |
| Base Diameter | 2.95 in |
| Bubble Spirit Level (No.) | 1 |
| Center of gravity | 2.17 in |
| Carrying Bag Included | yes |
| Center Column | no center column |
| Closed Length | 33.86 in |
| Color | Black |
| Top Attachment | 1/4″ screw, 3/8″ screw |
| Ball Flat | Flat |
| Powered by (batteries) | Lithium |
| Easy Link | Yes (with antirotation) |
| Front Tilt | -70° / +90° |
| Head Type | Video/Fluid Head |
| Leg Type | Twin |
| Leg Lock Type | Flip Lock |
| Material | Aluminum |
| Maximum Working Temperature | 122 °F |
| Minimum Working Temperature | -4 °F |
| Pan Bar Included | Yes |
| Pan Drag | continuously adjustable from 0 to max level |
| Panoramic Rotation | 360 ° |
| Plate Type | 504PLONGR-1 |
| Quick Release | Yes |
| Spreader | mid level - variable arm length |
| Tilt Drag | continuously adjustable from 0 to max level |
| Accessory Compatibility | 114MV; 181B; 165MV; MVAPANBARM; MVAPANBARL |
Motion control
 SY0031-0001
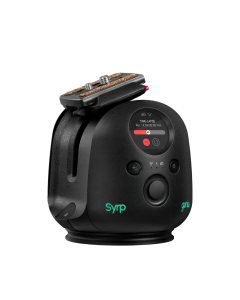
Genie II Pan Tilt
$1,994.95
| Weight | 4.25 lbs |
| Interface | 2.5mm Shutter Control Port, Bluetooth 4.2 Low Energy, USB-C Port, Wifi 2.4GHz, Color LCD Display |
| Compatibility | Genie II Linear |
| Dimensions | 5.16 x 4.72 x 5.16 in |
| Product Contents | 1 x Genie II Pan Tilt 1 x Quick Release Plate 65mm 1 x 1/4"-20 Camera Screw 1 x 3/8"-16 Camera Screw 1 x USB Type-C Charger 1 x USB-C Charger Cable 1 x AU/NZ Plug 1 x USA Plug 1 x EURO Plug 1 x UK Plug 1 x USB-C to USB-A Female Cable 1 x Camera Screw Thread Adapter 3/8"-16 to 1/4"-20 1 x Genie II Linear Setup Guide 1 x Lens Cloth |
| Max Speed Panning | 25 °/s |
| Max Speed Tilting | 11.25 °/s |
| Minimum Resolution Tilting | 0.01 ° |
| Tripod Mounting | Female 3/8"-16 thread |
| Camera Mounting Screw | 1/4"-20 Male, 3/8"-16 Male |
| Payload Panning | 13.23 lbs |
| Payload Tilting at 60 deg | 13.23 lbs |
| Payload Tilting at 180 deg | 6.61 lbs |
| Battery Life Time-Lapse | 12 hrs |
| Battery Life Video | 8 hrs |
| Charging time | 3 hours |
| Powered by (batteries) | Li-Ion Rechargeable |
| Charging mode | USB-C 5V DC, min 1Amp |
 SY0036-0001
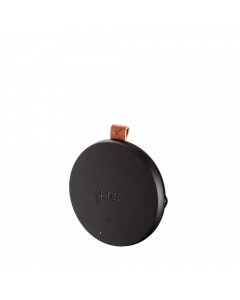
Genie Micro
$185.95
| Weight | 0.06 lbs |
| Interface | 2.5mm Shutter Control Port, Bluetooth 4.0, USB-C Port, Wifi 2.4GHz |
| Dimensions | 2.05 x 2.05 x 0.67 in |
| Product Contents | 1x Genie Micro 1x USB-C to USB-A Male Cable 1x USB-C to USB-A Male Cable 1x Micro Fiber Cloth |
| Camera Mounting Screw | Hot Shoe |
| Battery Life Time-Lapse | 7 hrs |
| Battery Life Video | 7 hrs |
| Charging time | 2.5 |
| Powered by (batteries) | Built in Lithium |
| Charging mode | USB-C 5V DC, min 1Amp |
 SY0064-0001
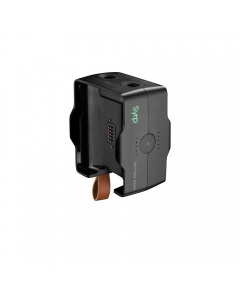
Portable Charger for Camera Battery Bank
$231.95
| Weight | 0.56 lbs |
| Interface | Usb 2.0, USB-C Port |
| Compatibility | Genie II Linear, Genie Mini II, Genie Mini (first edition), Genie II Pan Tilt, Genie One |
| Battery Ampere | 15600mAh capacity If using with pair of Syrp BP-02 batteries, (7800mAh equivalent per battery) |
| Dimensions | 3.03 x 2.56 x 1.97 in |
| Product Contents | Battery Bank, USB-C to USB-A Charging cable, Micro Fiber Lens Cloth, Velcrow tripod attachment, User Guide |
| Tripod Mounting | Female 1/4"-20 thread |
| Charging time | 1.5 Hrs (per battery / charger dependent) |
| Charging mode | USB-C |
Lighting
-
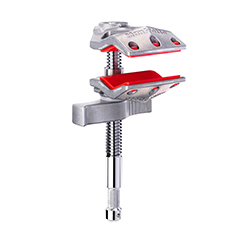
 175F-2
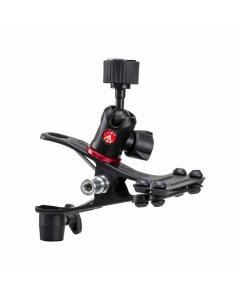
Cold Shoe Spring Clamp
$104.95Weight 0.77 lbs Payload 4.41 lbs Attachment 01 3/8" thread female, 5/8" (16mm) socket, 5/8" (16mm) stud Length 6.14 in Clamp range - max. (round tube) 1.57 in Clamp Range Min Round Tube 0.2 in Color Black Material Aluminum, Steel -
 LL LB7943
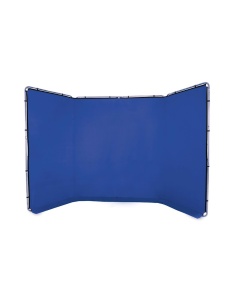
Panoramic Background 4m Chroma Key Blue
$757.95Weight 20.94 lbs Color chromakey blue Material Polyester Height 90.55 in Width 157.48 in In Bag - Depth 11.81 in In Bag - Height 40.94 in Weight - In Bag 19.84 lbs In Bag - Width 13.78 in